Excalidraw Figures in Hugo
2026-03-07Posts | 2 min read
#css #excalidraw #hugo
Series: Tech Behind the Blog
I love drawing things, especially in Excalidraw! I also need more dark mode support in my life.
In this post I’ll go through how I made Excalidraw exports render nicely on my blog in a light or dark mode aware fashion.
Let’s start by showing you the result, which is also the Diagram of how this works:

High Level Process
To achieve this I first took a look at the SVG file exported by Excalidraw. It is, exactly as expected, directly inlining all styles into the strokes it generates.
I know that I can use a filter: invert(1) in CSS to switch the Excalidraw export from white lines to black lines or the other way around.
Since light and dark mode are just data attributes for me I can do something like this:
[data-theme="light"] {
    --excalidraw-filter: invert(1);
}
[data-theme="dark"] {
    --excalidraw-filter: none;
}

excalidraw {
    filter: var(--excalidraw-filter);
}
But for that to work I need a custom class on Excalidraw SVGs rendered into pages.
The easiest way I found to do that was to copy-paste hugos figure shortcode into my layouts under the name excalidraw.html and simply adding a class to the figure in there.
This also leaves me with nice semantics when writing posts, see for example the way I added the high level progress above:
...

{{< excalidraw
  src="process.svg"
  caption="High Level Process"
>}}

...
Design Considerations
Originally I exported from Excalidraw in light mode, including a background. This worked, but left me with a flashing white blob on clean page loads, which is something I deeply despise. Exporting with a background also left me with excalidraw figures having a very different background color then all other figures.
In the end I chose these export settings:
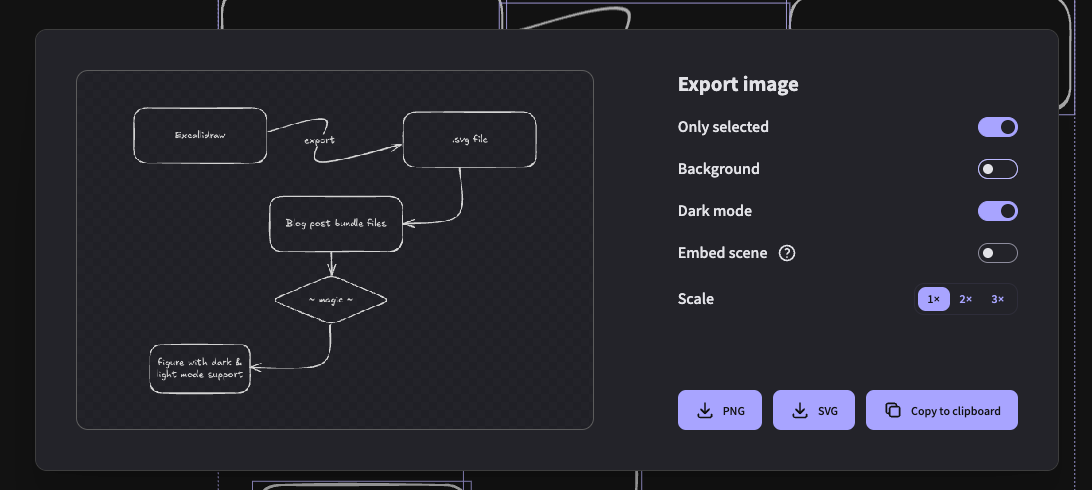
Excalidraw Export Settings